Table of Contents
you can draw a clean line. Great. But a tattoo isn't just lines. It's about making that image look like it belongs there, like it has weight and form. That's where shading walks in, or rather, glides in if you're doing it right. Bad shading makes a tattoo look like a sticker slapped on the skin – flat, muddy, maybe even blown out. Good shading? It creates depth, texture, and brings the whole piece to life. It's the difference between a sketch and a finished piece of art. Getting good at this isn't a mystery; it requires deliberate practice. And you can't just scribble randomly. You need specific tattoo designs to practice shading effectively. This article cuts through the noise to show you why dedicated shading practice is non-negotiable, how to find or create the ideal designs for honing your skills, the techniques and materials that actually work for practice, and how to measure your progress as you move from beginner smudges to smooth gradients. Ready to ditch the flat look?
Why Practice Tattoo Shading Matters
Why Practice Tattoo Shading Matters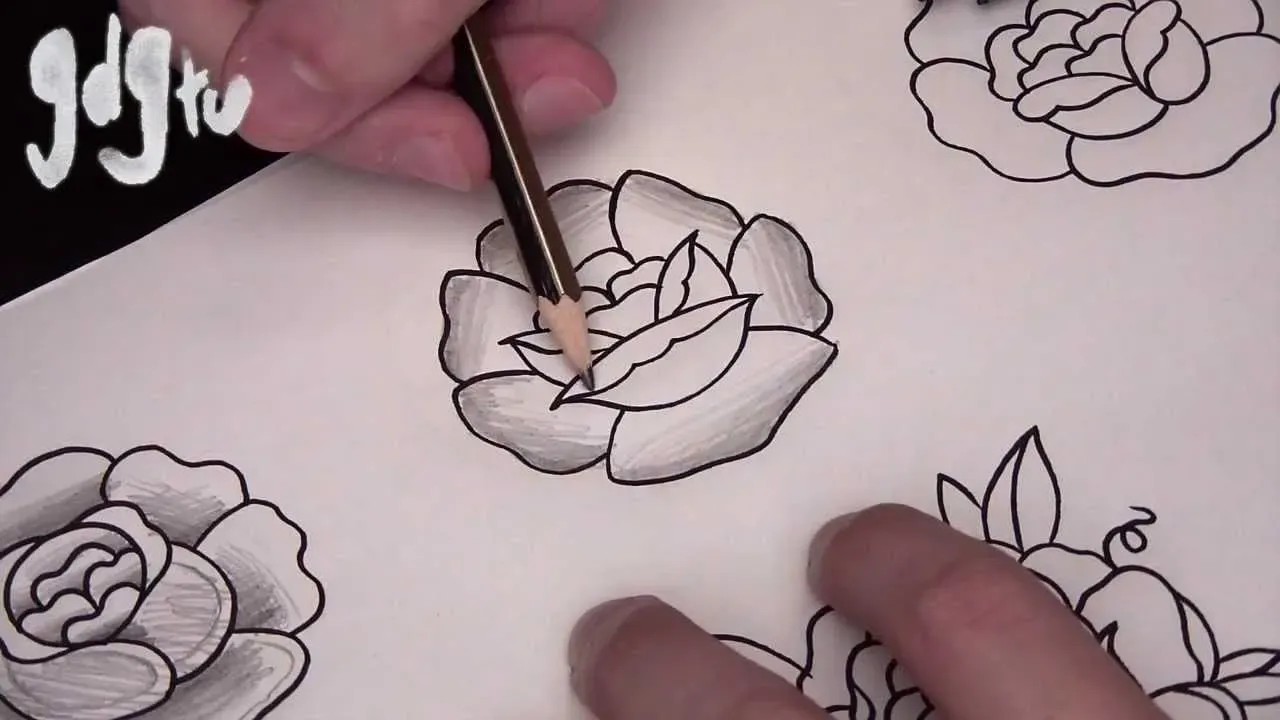
Beyond the Outline: Adding Dimension
Look, anyone can trace a line. Seriously, with enough patience and a steady hand, you can follow a stencil. But a tattoo that's just lines? It looks flat. Lifeless, even.Why Practice Tattoo Shading Matterscomes down to this: it's what transforms a drawing on skin into something that feels real, something with weight and depth. Think about portraits. Without shading, it's just a caricature. With proper shading, you capture the curve of a cheek, the shadow under a brow, the subtle transition that makes a face recognizable and full of character. You're not just coloring in; you're sculpting with ink.
Avoiding the Muddy Mess and Blowouts
This is where the rubber meets the road, or rather, the needle meets the skin. Shading isn't just artistic flair; it's about technical control. Mash that needle too deep or stay in one spot too long, and you've got a blowout – fuzzy lines that spread under the skin like a bruise. Move too fast or use the wrong angle, and your shading looks patchy, like a bad spray tan. Consistent, smooth shading requires learning how the needle interacts with the skin at different speeds, angles, and depths. It’s about building those layers gradually. Skipping dedicated practice on tattoo designs to practice shading means you'll learn these painful lessons on actual clients, and trust me, they won't be thrilled with a muddy mess that needs fixing.
- Shading adds depth and realism.
- It creates texture and visual interest.
- Proper technique prevents blowouts and patchiness.
- Consistent practice builds necessary muscle memory and control.
Finding the Right Tattoo Designs to Practice Shading
Finding the Right Tattoo Designs to Practice Shading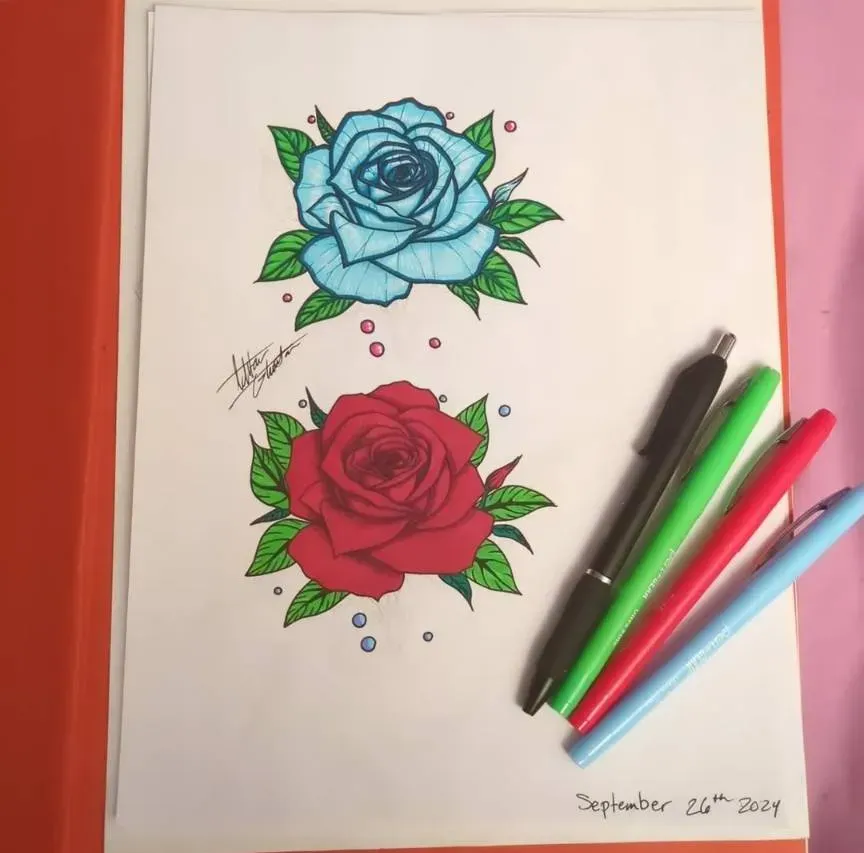
Start Simple: Geometric Shapes and Basic Objects
so you know why shading matters. Now, what do you actually practice on? Don't jump straight to a hyper-realistic portrait of your cat. That's a recipe for frustration. When you're just starting out, you need tattoo designs to practice shading that are forgiving and let you focus on the technique itself, not the complexity of the subject matter. Think simple. Geometric shapes like spheres, cubes, and cylinders are perfect because they have predictable light sources and shadows. Basic objects like apples, coffee cups, or even just simple folds of cloth work wonders. They allow you to concentrate on creating smooth gradients and understanding how light wraps around form without getting bogged down in intricate details.
Look for References, Create Your Own
Where do you find these magical practice designs? Everywhere. Grab a still-life book. Look at photos of simple objects with dramatic lighting. Pinterest and Instagram are full of reference photos, but be selective. You want clear light and shadow, not muddy phone pics. Even better? Set up your own simple still life. Grab a lamp and a few objects – a ball, a crumpled piece of paper, a box. Play with the light source. Draw them from different angles. This teaches you to see light and shadow, which is crucial for translating it into a tattoo. Don't just copy line art; study how light hits the form and where the shadows fall.
- Spheres, cubes, and cylinders for fundamental form.
- Simple objects like fruit or cups with clear lighting.
- Crumpled paper or fabric to practice textures and folds.
- Use reference photos with strong light and shadow contrast.
- Set up your own still life arrangements.
Progressing to More Complex Subjects
Once you feel like you're getting a handle on basic forms and smooth transitions, you can start adding complexity to your tattoo designs to practice shading. Think simple flowers, leaves, or basic skulls. These introduce more intricate shapes and textures but are still manageable. The key is gradual progression. Don't leap from a sphere to a full back piece. Build your skills incrementally. As you get better, you can tackle things like animal fur, wood grain, or simple portraits. Each step should challenge you slightly without overwhelming you, allowing you to apply the foundational shading principles you've been practicing.
Techniques and Materials for Shading Practice
Techniques and Materials for Shading Practice
Mastering the Hand Movements: Whip, Pendulum, and Packing
Alright, you've got your simple shapes and objects lined up. Now, how do you actually lay down that ink to create smooth shading? It's not just one magic move. You've got techniques. There's the whip shade, where you flick the machine out of the skin quickly to get a gradient effect – lighter as you flick away. Then there's the pendulum or sweeping motion, swinging the machine back and forth like a pendulum, controlling how much ink goes in by how fast or slow you swing and the angle. Packing is for solid areas, pushing that ink in evenly. Each technique feels different and gives a distinct look. Practicing tattoo designs to practice shading means isolating these movements. Spend a whole session just doing whip shades on spheres. The next, work on packing solid black into squares. Don't try to do everything at once. Break it down.
Choosing Your Canvas: Fake Skin, Pig Skin, or Even Fruit?
you're not going straight to human skin (please, for the love of all that is holy, don't). You need practice surfaces. Fake skin is the go-to for many beginners. It's relatively inexpensive, readily available, and mimics some of the resistance of real skin, though it can be less forgiving with blowouts if you're heavy-handed. Pig skin is often cited as the closest thing to human skin in terms of texture and how it takes ink, but it requires proper handling and sourcing, and frankly, it can be a bit gross. Some old-school artists swear by grapefruit or oranges for practicing needle depth and feel – the rind has a texture that gives you some feedback. Paper, while not mimicking skin at all, is excellent for planning your shading, figuring out light sources, and practicing gradients with pencil or charcoal before you even pick up a machine. Use a mix of these materials as you learn the techniques for tattoo designs to practice shading.
- Fake skin: Good all-around, mimics some resistance.
- Pig skin: Closest texture to human skin (handle with care).
- Grapefruit/Oranges: Practice needle depth and feel.
- Paper: Essential for planning and sketching gradients.
Progressing Your Shading Skills with Practice Designs
Progressing Your Shading Skills with Practice Designs
so you've spent hours making spheres look like spheres and whipping gradients on fake skin. You're feeling… slightly less terrible than when you started. Now, how do you know you're actually making progress? And how do you keep Progressing Your Shading Skills with Practice Designs without just doing the same thing over and over? It's not about hitting some magical level; it's about consistent, observable improvement. You need to look critically at your work. Is the gradient smooth? Are there patchy spots? Did you blow out areas? Be brutal with yourself, but also objective. Compare your latest practice piece to one you did a month ago. The difference, even small, is progress. Get feedback from someone who actually knows what they're talking about, not just your mom who thinks everything you do is amazing. Find an experienced artist willing to give you honest critique. Their eyes will catch things you miss.
Mastering the Art of Depth
So, you've seen that just drawing lines isn't enough. Shading is the heavy lifting in tattooing, the part that makes skin art look like art, not just ink. Finding the right tattoo designs to practice shading isn't just busywork; it's targeted training. It's about building muscle memory, understanding needle angles, and seeing how ink settles. There's no magic shortcut, just repetition with purpose, using the right tools and pushing past the frustrating attempts. Get serious about these practice designs, and you'll start seeing depth appear where there used to be only flat shapes. Your clients will notice. Your work will speak for itself.