Table of Contents
Ever wondered how those mind-blowing tattoo designs come to life? It's more than just drawing; it's an art form blending creativity with technical skill. If you're itching to learn how to do tattoo designs that truly stand out, you're in the right place. Forget complex jargon and confusing steps. I'm breaking down the entire process, so even if you're just starting out, you'll grasp the essentials. We'll explore everything from gathering killer reference photos and picking your style, to mastering hand-drawing and digital techniques. We will look into adding depth to your designs, ensuring they flow with the body's curves, and making them look amazing for years to come. It's like learning the secrets to making tattoos that not only look good but also last. So, grab your sketchbook or stylus, and let's dive into the exciting world of tattoo design!
Nailing the Basics: Reference Photos and Tattoo Styles
Nailing the Basics: Reference Photos and Tattoo Styles
Finding Your Muse: The Power of Reference Photos
Think of reference photos as your cheat sheet. They're not about copying, but about understanding. Want to draw a realistic rose? Find a dozen photos of roses in different stages of bloom, different lighting, and different angles. This helps you understand the form, the shadows, and the texture.
Don't just grab the first image you see. Dig deep! Look at professional photos, amateur snapshots, even botanical illustrations. The more you see, the better you'll grasp the subject. It's like building a visual library in your head.
Choosing Your Tattoo Style: From Traditional to Neo-Tribal
Tattoo styles are like different genres of music. There's traditional (bold lines, classic imagery), neo-traditional (a modern take on the classics), realism (like a photograph), watercolor (soft, flowing colors), and tons more. Finding your style is like finding your voice as an artist. It's what makes your work unique.
Experiment! Try drawing the same subject in different styles. See what feels natural to you. Don't be afraid to mix and match elements from different styles, either. Tattooing is all about pushing boundaries and creating something new.
Tattoo Style | Key Characteristics | Example Imagery |
|---|---|---|
Traditional | Bold outlines, limited color palette, classic motifs | Sailor Jerry designs, roses, anchors |
Neo-Traditional | Similar to traditional but with more detail and color | Animals, portraits, floral designs |
Realism | Highly detailed, photographic quality | Portraits, landscapes |
Watercolor | Soft, flowing colors, no hard outlines | Abstract designs, floral elements |
Color Palette Considerations: Making Your Tattoo Pop
Color can make or break a tattoo. Think about contrast. Bold colors stand out, while muted tones create a softer look. Also, consider how the colors will look on different skin tones. A color that pops on fair skin might fade into darker skin.
Research color theory! Understanding how colors interact with each other can help you create visually stunning tattoos. Complementary colors (like red and green) create contrast, while analogous colors (like blue and green) create harmony.
Remember that tattoos fade over time. Bold colors tend to hold up better than pastels. Black ink is the most stable color, so it's often used for outlines and shading.
HandDrawing vs. Digital: Tattoo Design Techniques
HandDrawing vs. Digital: Tattoo Design Techniques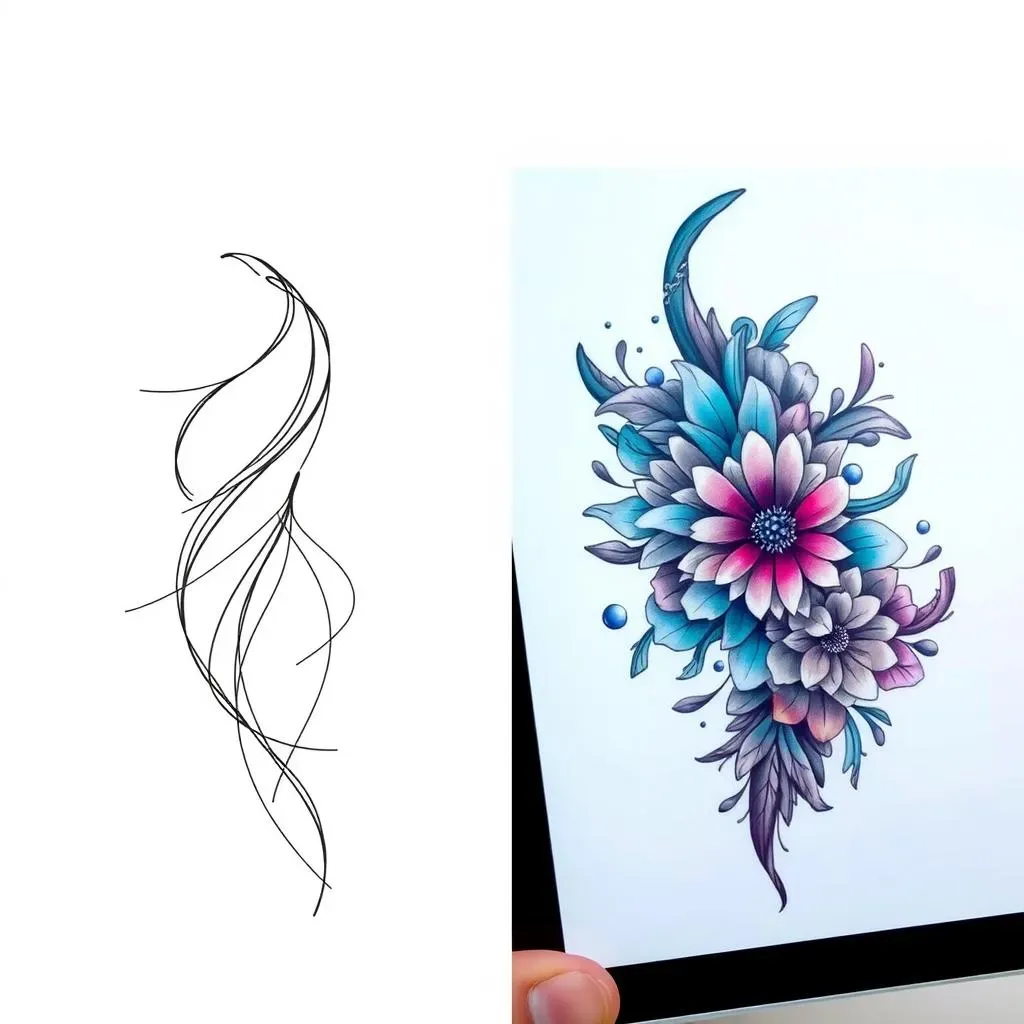
The Allure of Hand-Drawing: Pencil to Paper
There's something undeniably cool about hand-drawing a tattoo design. You're literally connecting with the art, feeling the pencil on paper, and having complete control over every line. It's a traditional approach, and it forces you to slow down and really think about your design. Plus, there's no "undo" button, which can be a good thing! It encourages you to be more deliberate and confident in your strokes.
Hand-drawing is amazing for developing your eye and your muscle memory. You learn to see shapes, understand shading, and create depth with just a few simple tools. Many tattoo artists start with hand-drawing, even if they eventually switch to digital for the final design. It's a skill that will always be valuable. I remember when I first started, my mentor would make me redraw the same design over and over until I got it perfect. Drove me nuts at the time, but now I get it!
Digital Design: Pixels and Possibilities
Digital tattoo design is where it's at if you want precision, flexibility, and a whole lot of control. Software like Procreate, Adobe Photoshop, and Illustrator lets you create super detailed designs, experiment with different colors and effects, and make changes on the fly. It's also great for collaborating with clients remotely, since you can easily share your work and get feedback.
The downside? There's a learning curve. Getting comfortable with digital art software takes time and practice. And it's easy to get lost in all the bells and whistles, forgetting the fundamentals of good design. But once you master the tools, the possibilities are endless. I've seen artists create tattoos that look like they're glowing, or that have insane levels of detail, all thanks to digital design.
Technique | Pros | Cons |
|---|---|---|
Hand-Drawing | Develops artistic skills, traditional feel, no tech needed | No "undo" button, less precise, harder to share |
Digital Design | Precise, flexible, easy to edit and share, wide range of effects | Learning curve, can be overwhelming, requires software and hardware |
Tattoo Design Like a Pro: Depth, Flow, and Longevity
Tattoo Design Like a Pro: Depth, Flow, and Longevity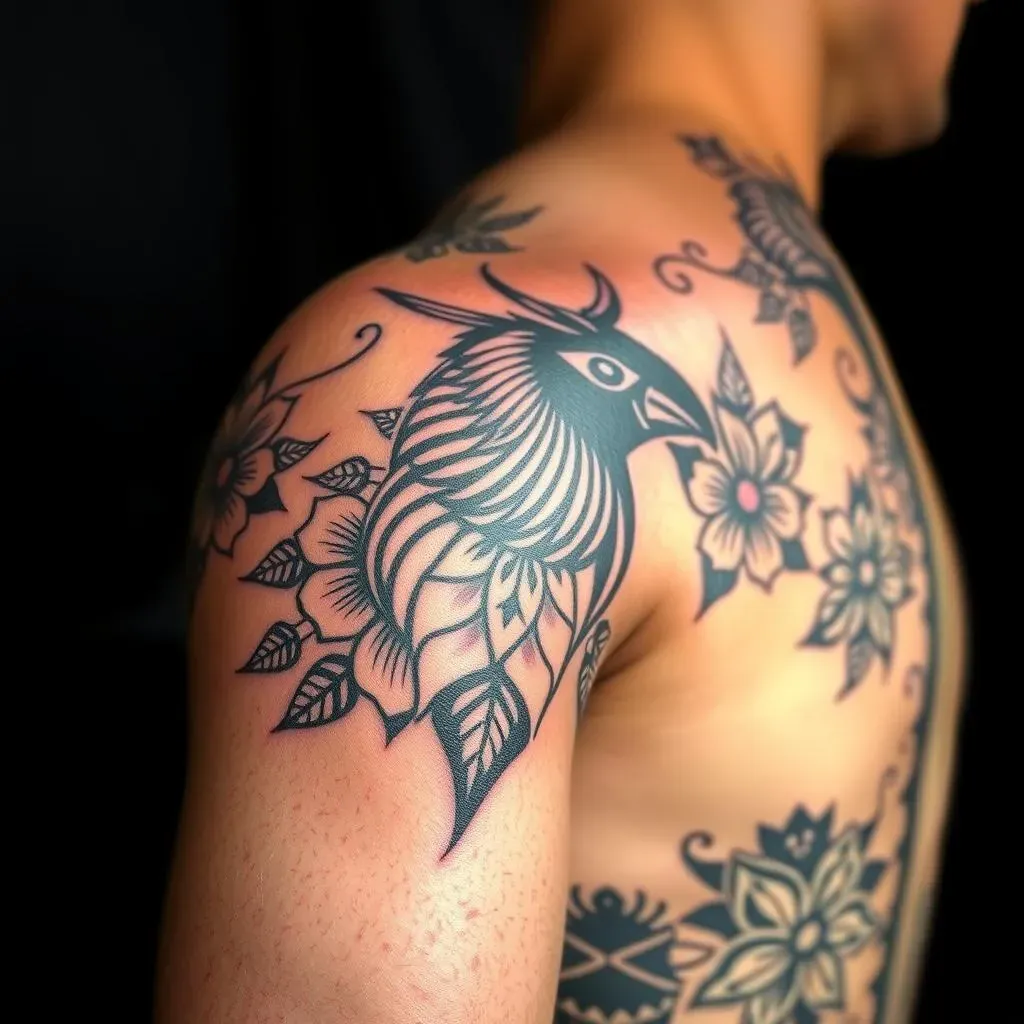
Creating Depth: Foreground, Middleground, and Background
Ever look at a tattoo and it just seems flat? That's usually because it's missing depth. Depth is what makes a tattoo look three-dimensional, like it's popping off the skin. The secret is to think in layers: foreground, middleground, and background. The foreground is closest to the viewer, so it should have the most detail and the darkest lines. The background is farthest away, so it should be softer and less defined. The middleground bridges the gap between the two.
Think of a landscape tattoo. In the foreground, you might have a detailed tree with sharp lines and vibrant colors. In the middleground, you could have a blurry field of flowers. And in the background, you might have a distant mountain range with soft, faded colors. By creating these layers, you trick the eye into seeing depth, even though it's just a flat image on skin.
Flowing with the Body: Placement and Movement
A tattoo that doesn't flow with the body looks awkward and out of place. The best tattoos complement the body's natural curves and enhance its shape. Before you even start drawing, think about where the tattoo is going to be placed. Is it on the arm, the leg, the back? Each placement has its own unique contours and movements. A design that looks great on paper might not translate well to the body if you don't consider these factors.
Consider the movement of the muscles. A tattoo on the bicep, for example, will change shape when the muscle is flexed. You need to design the tattoo in a way that it still looks good in both positions. This often means avoiding straight lines and rigid shapes, and instead opting for flowing curves and dynamic compositions. I once saw a tattoo of a snake that wrapped around someone's arm, and it looked like it was actually slithering as they moved. That's the kind of effect you want to aim for!
Body Part | Considerations for Flow | Example Designs |
|---|---|---|
Arm | Muscle movement, curvature of the limb | Snakes, vines, geometric patterns |
Leg | Shape of the calf, ankle, and thigh | Waves, dragons, abstract designs |
Back | Spine alignment, shoulder blade movement | Wings, trees, large-scale imagery |
Tattoo Longevity: How to Design for the Future
Tattoos are forever (or at least a very long time), so you need to design them with longevity in mind. This means considering how the tattoo will look as it ages. Fine lines tend to blur over time, so it's best to avoid them. Bold lines and solid colors hold up much better. Also, think about sun exposure. Sunlight can fade tattoos, especially those with light colors. Encourage your clients to protect their tattoos with sunscreen.
The client's skin tone also plays a role in longevity. Tattoos on darker skin tones tend to fade more quickly, so it's important to use colors that will stand out and last. Black ink is always a safe bet, but you can also use other dark colors like navy blue or deep purple. Remember, a well-designed tattoo should look just as good in 10 years as it does on day one. It's an investment, and you want to make sure it lasts.
- Use bold lines for outlines.
- Opt for solid colors over fine details.
- Consider the client's skin tone.
- Advise clients on proper aftercare and sun protection.
Your Tattoo Design Journey Starts Now
So, you've got the lowdown on how to do tattoo designs. Remember, it's a mix of practice, patience, and a dash of daring. Don't be afraid to experiment, find your unique style, and most importantly, keep learning. Whether you're sketching on paper or creating digital masterpieces, the world of tattoo design is waiting for your creativity. Now go out there and make some ink magic happen!